
The Bizarre Journey Stand and fighting-style combinations
Choose your Stand around the fight you want to take: close-range combos, swarm pressure, or aerial movement. Hamon and Vampire add different attacks, and their controls change with your summoned Stand.
Choose Star Platinum for aggressive close-range combos, Harvest with Vampire for swarm pressure and area attacks, or Harvest with Hamon to keep Overdrive, Zoom Punch, and Charge alongside your swarm. Choose Hermit Purple with Vampire when aerial movement is your priority. The Sun also works alongside Vampire's attacks.
Choose a setup for your combat goal
| Setup | Combat goal | Key tools |
|---|---|---|
| Star Platinum | Close-range combos | Launchers, grabs, finishers |
| Harvest + Vampire | Groups and close-range bosses | Swarm + area slash |
| Harvest + Hamon | Alternate attack options | Swarm + Overdrive + Zoom Punch |
| Hermit Purple + Vampire | Aerial mobility and melee | Hermit Swing + Vampire attacks |
| The Sun + Vampire | Sun skill with melee attacks | Sun + Vampire attacks |
Star Platinum suits players who want to stay close, extend an exchange, and finish with knockback. Its awakening creates a time-stop opening for further attacks.
For clustered enemies, choose Harvest with Vampire: Harvest surrounds nearby targets while Vampire adds an area slash and additional close-range actions. Choose Harvest with Hamon when you want to alternate swarm combat with Hamon's attacks and charge action.
Hermit Purple shifts the Stand's role toward movement. Hermit Swing carries you forward through the air, while Vampire supplies your area and close-range attacks. The Sun pairing keeps its sun-themed skill available alongside Vampire.
Unlock the abilities your setup needs
Equip the Stand and fighting style for your chosen setup. For Hamon, complete Unlocking Hamon by defeating 5 Vampires, then select Hamon from the hotbar.
Harvest's movement and additional attacks depend on Fighting Spirit:
| Ability | Requirement | Key |
|---|---|---|
| Humanoid Formation | Harvest equipped | E |
| Harvest Slide | 623 Fighting Spirit | Z |
| Swarm Rush | 2,625 Fighting Spirit | R |
The two Spirit requirements are separate unlock thresholds, not costs to add together or character-level requirements. Before unlocking Slide or Swarm Rush, build your approach around Humanoid Formation and your equipped style's available attacks. Once Slide is unlocked, use it to reposition on the gathered Harvest units; it enters cooldown after use.
Summoning a Stand changes Hamon's Sunlight Yellow Overdrive, Zoom Punch, and Hamon Charge from E, R, Z to X, G, C. Vampire's attack keys also change between Harvest, Hermit Purple, and The Sun. Use the bindings for your current combination rather than carrying the previous setup's inputs into the next fight.
Vampire's Shadow Step stays on Q across these three pairings. It holds 2 charges, spends them when used, and recovers charges over time. Watch its charge counter and your attack cooldowns before committing to another exchange. See combat controls and Stand switching for the general switching controls.
Star Platinum for close-range combos
Choose Star Platinum when you want launchers, a defense-breaking grab, and knockback finishers in the same close-range toolkit. Use each move to match the opening:
- Uppercut: close the distance and launch the opponent to start a new combo.
- Barrage: use rapid punches to start or extend pressure by skipping the finisher. Complete the finisher when you want the higher-damage ending.
- Punishment: grab an opponent to break through their defense.
- Kick Barrage: finish the exchange by knocking the opponent backward.
- Star Finger: finish with sideways knockback.
Against an opponent with strong ranged attacks, use a revolver to create an opening to approach. Pressure them toward an area with limited escape routes so that reaching melee range leads to an opportunity to attack.
Land attacks to fill the awakening meter, then press G at full meter to activate Star Platinum: The World when you have an opening to deal damage. Time stop prevents opponents in its large area from moving normally, and the awakening adds Harpoon and Beatdown. Harpoon gives you a dedicated ranged projectile.
Save Beatdown until near the end of the awakening to use more of the transformation's attack window first. Beatdown upgrades Punishment into a cinematic attack that the opponent cannot interrupt after it lands. Its unlock drops from Jotaro (Part 6).
Harvest with Vampire or Hamon
Harvest with Vampire
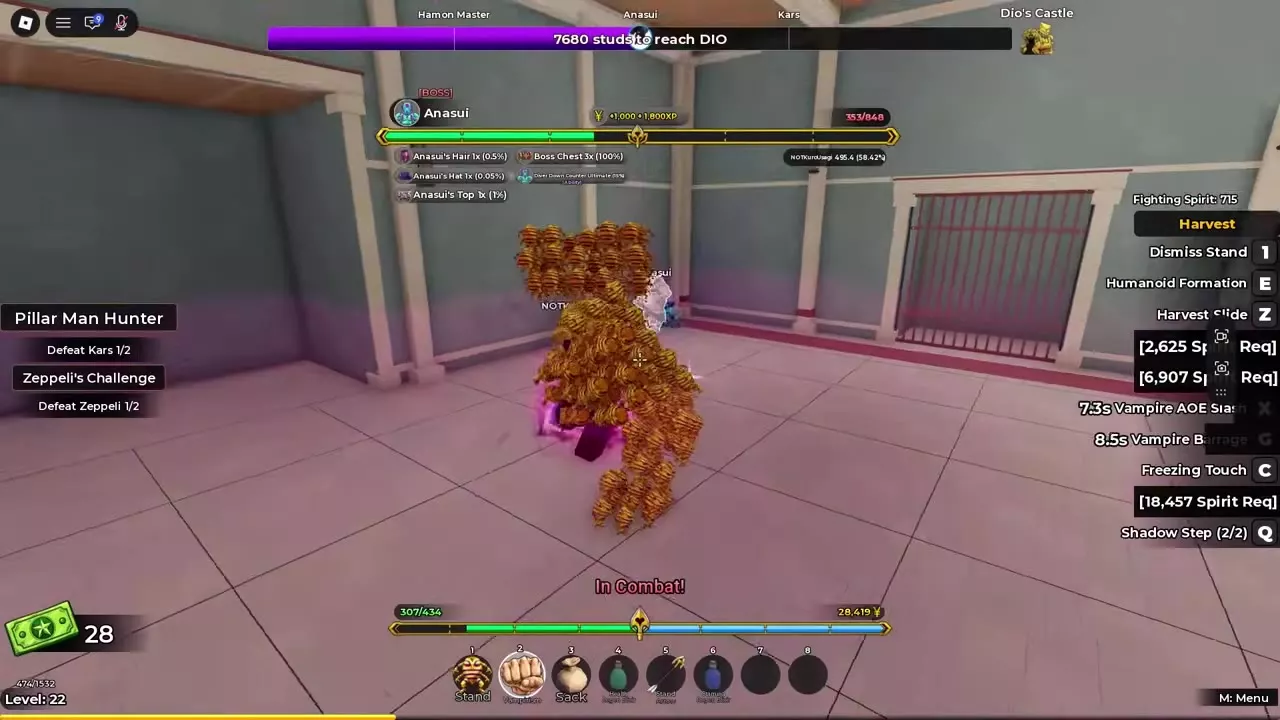
Choose this pairing for Harvest's close-range swarm pressure plus Vampire AOE Slash against groups. Press E for Humanoid Formation and approach the target with the gathered units. Use X for Vampire AOE Slash, G for Vampire Barrage, and C for Freezing Touch as those actions become available between cooldowns.
This pairing gives you area attacks for clustered enemies and extra close-range actions for bosses. After unlocking Harvest Slide, you also have sliding movement alongside Shadow Step. Keep moving between exchanges instead of staying beside the boss while your attacks recover.
A Prison Break run using Harvest with Vampire defeats Anasui. The pairing also supports close-range pressure in the Kars encounter.
Harvest with Hamon
Choose this pairing to keep Sunlight Yellow Overdrive, Zoom Punch, and Hamon Charge available alongside Harvest. With the Stand summoned, use X for Overdrive, G for Zoom Punch, and C for Charge; Harvest retains its own E, Z, and R actions as they unlock.
You can also dismiss the Stand with 1 to return to Hamon's standalone attack bindings. This suits a fight where you want to alternate direct Hamon attacks with Harvest's gathered units.
In one Prison Break run, attacking with Hamon and then switching to Harvest against the clustered enemies clears Wave 5. That run's later Anasui attempt ends in defeat. Use the wave clear as an example of switching attack options; the boss still requires you to manage incoming attacks and cooldowns. Follow the Prison Break and Anasui guide for the encounter sequence and recovery between waves.
Hermit Purple and The Sun with Vampire
Hermit Purple: movement first
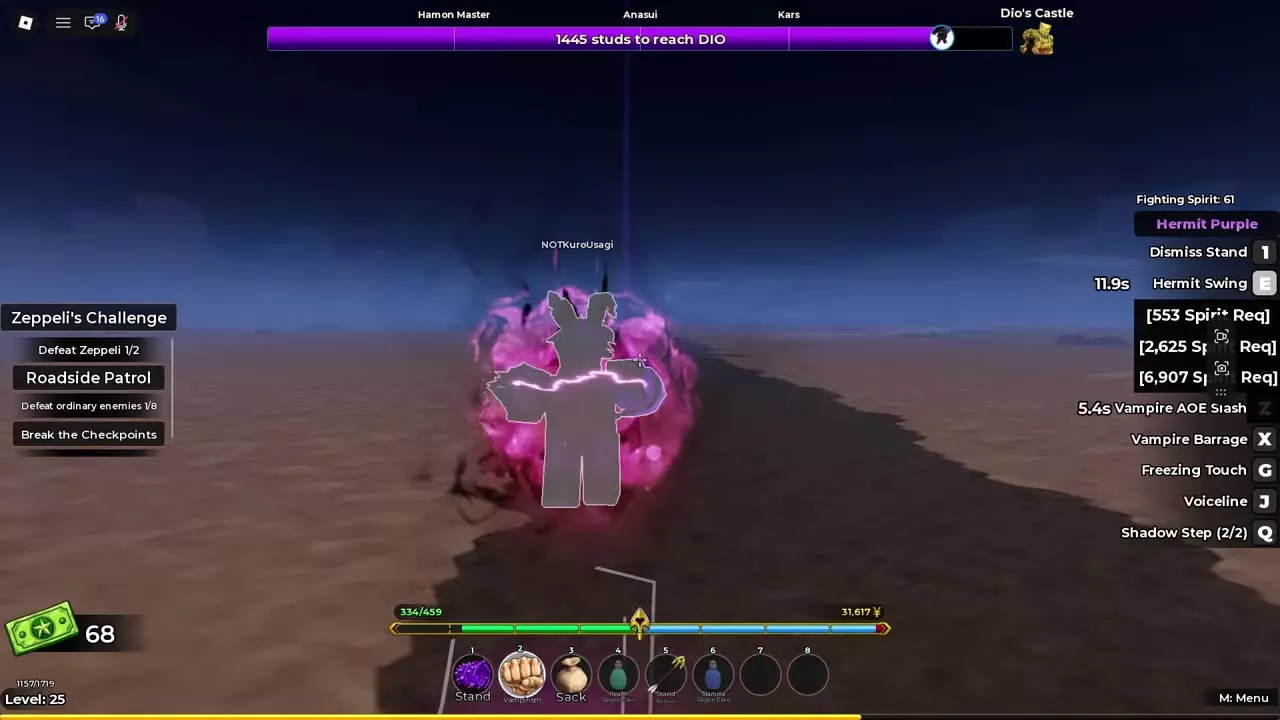
Choose Hermit Purple with Vampire when forward aerial movement matters more than Harvest's swarm attacks. Press E for Hermit Swing to travel through the air. Vampire supplies AOE Slash on Z, Vampire Barrage on X, and Freezing Touch on G for combat.
Use Swing for movement, then approach to land your Vampire attacks. This pairing is used against Jotaro (Part 6), Cool Vampire, and DIO, with close-range attacks and returns to the target after separation. During Jotaro training, return closer within 20 seconds when the distance warning appears to keep training.
The Sun: sun skill alongside Vampire
With The Sun and Vampire, press E for Sun, Z for Vampire AOE, T for Vampire Barrage, and R for Freezing Touch. The sun skill remains available alongside the style's attacks and enters cooldown after use.
A Zeppeli attempt with this pairing ends in death. The death screen offers Return To Menu and Revive Yourself, with a 2:00 self-revive timer.
Ability details and encounter guides
- Stands and abilities — skill details, Fighting Spirit progression, and awakenings.
- Hamon and Vampire fighting styles — unlock requirements and style controls.
- Prison Break waves and Anasui — the five-wave challenge and boss finish.
- Dio's Castle: Cool Vampire and DIO — the castle encounters and final battle.
- Bosses and rewards — encounter entries and boss reward details.